The holiday season is practically here! With Halloween, Thanksgiving, Christmas and New Year’s coming up quickly, you know that you’ll not only be taking hundreds of photos over the next several months to show off to family and friends, you’ll also be redecorating your house constantly, in an effort to match each month’s festive theme. This means, you’ll also need quite a few different frames to go along with the rotating sets of pictures you’ll have up on display for guests to view.
With all the stress of preparing for the holidays, filled with repeated housecleanings, redecorations and getting mentally ready to have family staying at your house, it’s important not to forget to find ways to relax so you can continue to look like your gorgeous self in those holiday photos! Luckily, we have a way for you to accomplish several of these things all in one fun and productive project!
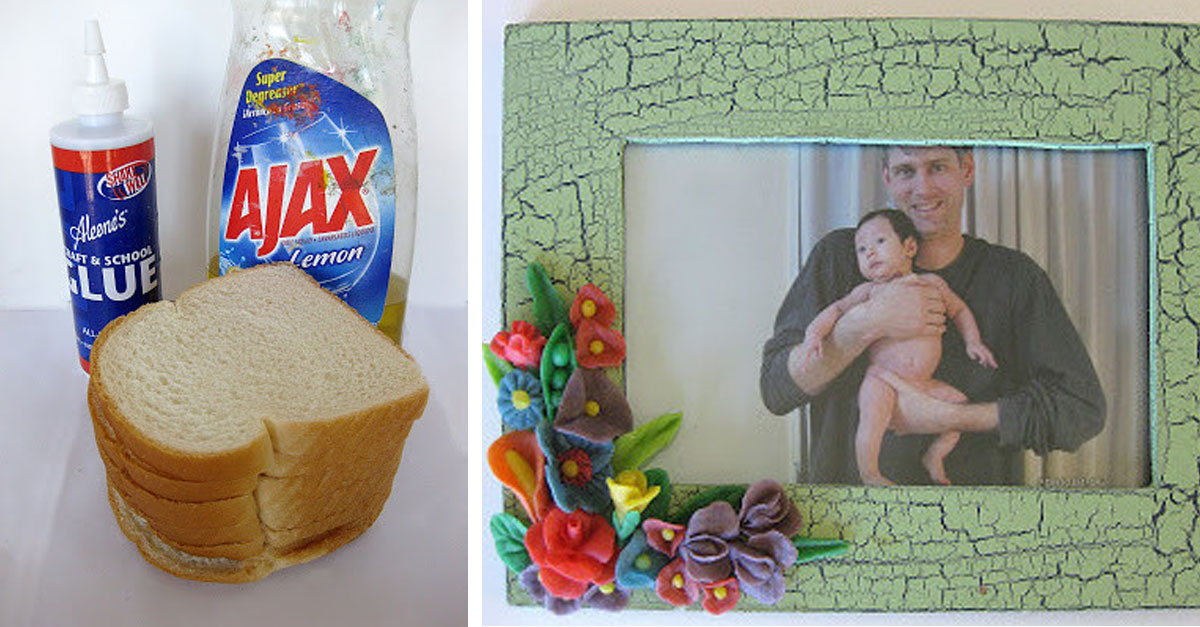
Here’s how you can turn a simple loaf of old bread into clay for a relaxing art project and also create yourself some new holiday picture frames for all those family photos, at the same time!
To do this, cut the crust off of six pieces of white bread.

IMAGE SOURCE: JUSTDIY
Chop up the crusts in a food processor until they’ve been reduced to a thin layer of fine crumbs. Mix three tablespoons of white Elmer’s glue and a few drops of dishwashing soap together with the crumbs. This will create a sticky dough that you will knead until smooth. Divide the dough into several smaller balls and add a different color of food coloring to each one. Keep in mind that the food coloring will continue to saturate the clay as it dries, so the color will deepen and darken over time.

IMAGE SOURCE: JUSTDIY
Place the balls of dough in the refrigerator for about an hour to allow the colors time to fully saturate each ball of dough. This will make them less likely to bleed into the other colored clay when you create little designs and sculptures to go along with your picture frames.

IMAGE SOURCE: JUSTDIY
After the hour’s up, take your colored dough out of the fridge and use your hands or kitchen tools to form a frame around an old photograph. Then create some Halloween, Thanskgiving, Christmas and New Years themed designs to stick along the outside of the frames.

IMAGE SOURCE: JUSTDIY

IMAGE SOURCE: JUSTDIY

IMAGE SOURCE: JUSTDIY

IMAGE SOURCE: JUSTDIY
Set the frames out on the counter for a few hours to dry and stick any leftover clay back in the fridge. After the frames have dried, turn them over, and press some small squares of clay into each corner on the back of the frame, to create little “hooks” to hold your pictures firmly in place.

IMAGE SOURCE: JUSTDIY

IMAGE SOURCE: JUSTDIY
SHARE the love and pass it on!
