Have a bunch of those old trophies laying around in boxes ? You know, the ones that are collecting dust in your kids’ room while they’re away at college. Do something functional with them, and get crafty with this fun DIY project! You can use them to make a cool, sports-themed hat/umbrella/coat rack!
You’ll need quite a few things for this project, but the finished product looks amazing and is so worth it! Check your garage to make sure you have a drill, a drill bit that is just a little bit smaller than ¼ in., 4 screws, one ¼ inch nut for each trophy, 1 bolt/topless screw that will fit into your ¼ inch nuts, 2 metal wall mounts & screws the size of the holes in these. Metal wall mounts usually come in little packets with the screws inside, and can be purchased at your nearest hardware store, like Home Depot.
You’ll also need a hammer, a tape measure, blue painter’s tape, a belt sander (or sandpaper), a saw, a 36” long wooden board, and some paint or wood varnish of your choice. If you don’t have an old used 30” baseball bat laying around, go buy a super cheap one from WalMart. Then just snag up your Sharpie, and you’re ready to get started!

IMAGE SOURCE: INSTRUCTABLES
If your plank is longer than 36”, use your saw to cut it down to size. Sand your 36” board, ensuring that you scrape in the same direction as the grain. Focus on rounding out the edges, or even beveling them. Use the wood stain or paint you chose to color your wood board, and leave it out to dry.
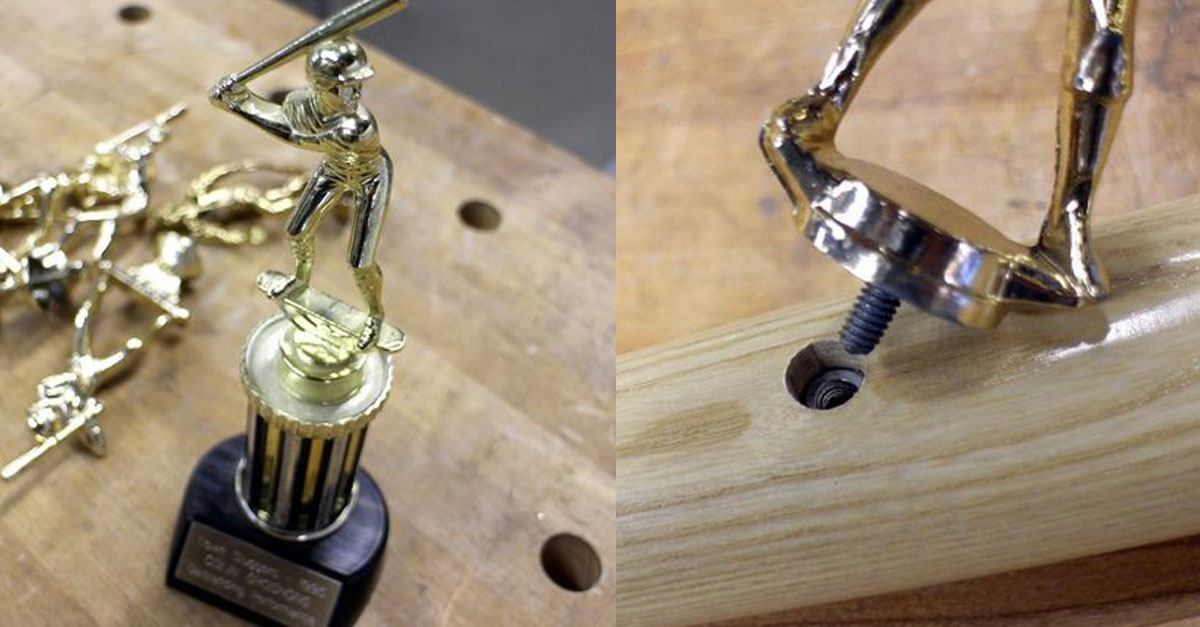
Separate the figurines from their bases. Usually, these have quarter-inch screws here. LEAVE THE SCREWS THERE! If you remove them, this project won’t work.

IMAGE SOURCE: INSTRUCTABLES
Lay out your tape measure alongside your bat. Make little Sharpie marks on the bat where you will later drill a hole for each of your trophies. These characters are probably all different sizes, so lay them out next to the bat to make sure they will be spaced evenly. You’ll also want to double check that all your black marks are in an exactly straight line.

IMAGE SOURCE: INSTRUCTABLES

IMAGE SOURCE: INSTRUCTABLES

IMAGE SOURCE: INSTRUCTABLES
Place your drill bit alongside your bat and note the halfway point on the bit, by wrapping a piece of blue painter’s tape there. This will be your depth gauge. Now drill holes halfway through the side of your bat where your trophies will go, stopping at that halfway point.

IMAGE SOURCE: INSTRUCTABLES

IMAGE SOURCE: INSTRUCTABLES
On the opposite side of your bat from the trophy holes, use the edge of your flat board to draw a line lengthwise. Sand down one whole side of the bat, following this line, until it is flat enough that it can be mounted on top of the board. If you have a belt sander, this will be the most efficient tool to use here. If not, you can use your hand-saw remove a very small section, before using sandpaper to flatten it by hand.

IMAGE SOURCE: INSTRUCTABLES
Now, grab your painted board again and set your bat aside for a second. With your permanent marker, make four marks, evenly spaced, but in a straight line, lengthwise down the board, spaced so that when you screw your bat on, it will be centered in the middle, with about 2-3” extra space on each end. Use your 4 random screws to screw the bat to the board, from the back of the board.

IMAGE SOURCE: INSTRUCTABLES

IMAGE SOURCE: INSTRUCTABLES
With your permanent marker, make four “x”s, evenly spaced, but in a straight line, lengthwise down the board, spaced so that when you screw your bat on, it will be centered in the middle of it, with about 2-3” extra space on each end. Use your 4 random screws to screw the bat to the board, from the back of the board.

IMAGE SOURCE: INSTRUCTABLES

IMAGE SOURCE: INSTRUCTABLES
Following the directions that came with your metal wall mounters, attach those to the back of the board.
Next, take your metal nuts, and thread one onto each end of all of your screw bolts. Now place each nut-and-bolt into the holes you drilled for your trophies, and hammer them down, until each fits perfectly and tightly inside its hole. Unthread the screw bolts from the now-stuck-in-your-bat nuts. Those metal screw bolts should only have one nut left on one end now. Set these aside for later use on some other project, because instead, you’re going to use the screws attached to the bottom of your trophies, to gently thread the trophies into the nuts stuck inside the holes on the bat.

IMAGE SOURCE: INSTRUCTABLES

IMAGE SOURCE: INSTRUCTABLES

IMAGE SOURCE: INSTRUCTABLES

IMAGE SOURCE: INSTRUCTABLES
And that’s it! Now you have a gorgeous hat, scarf or coat hanger to mount on your wall.

IMAGE SOURCE: INSTRUCTABLES

IMAGE SOURCE: INSTRUCTABLES
SHARE the love and pass it on!
