Looking for new Christmas decoration ideas? If so, you will adore these cute DIY ornaments that look just like little winter hats made out of yarn.
This neat DIY video was posted by Handimania, a DIY crafting community with over a million fans in 45 different countries. This simple explanatory video has easy step-by-step instructions for how to make your own little yarn hats. This is a great arts and crafts project to do with your kids while they’re out of school over the next couple of weeks.
If you find they’re running around the house, bored to tears and driving you crazy while you’re trying to get chores done, sit them down and have them do this fun project. It’s easy enough for even young kids to try and they will love hanging their cute little hats on the Christmas tree this year.
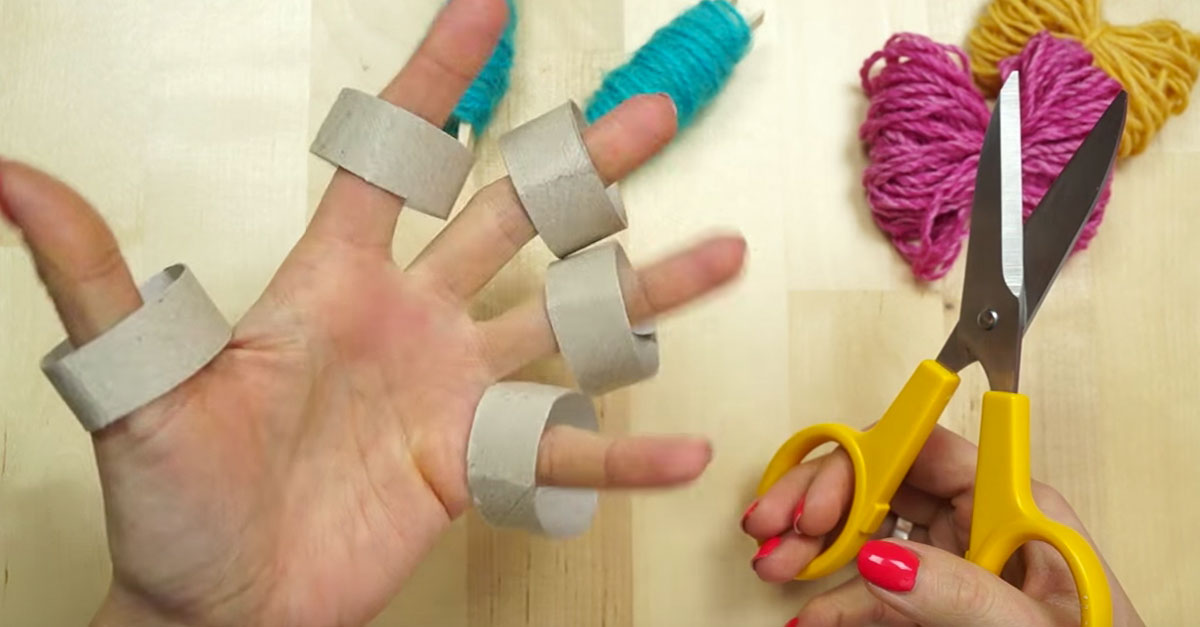
To make these, all you need is a few different colors of yarn, scissors, a ruler, a pencil, and a cardboard toilet paper roll.
Take the toilet paper roll and fold it in half. Then, using your ruler and pencil, make little marks lengthwise down the center of the roll, each set two centimeters apart. Then, cut along these lines so that you have about 5 small rings of cardboard. Cut about 30-40 pieces of yarn, about 25 cm long.
Folding each string of yarn in half, loop them around the cardboard ring, side by side, until the entire ring is covered. This ring will be the brim of your teeny hat. Then, gather half the hanging strings in your hand, twist them, and loop them through the ring so they hang out the other side now.
Do the same with the other half. Now, take one more string and tie it around all your hanging strands, about halfway up their length. Next, you’ll cut off the extra ends, to make a little poof ball on top of your hat, leaving one strand long enough to make a loop to hang your hats from a branch. Now you’re done! How cute are these?!
SHARE the love and pass it on!